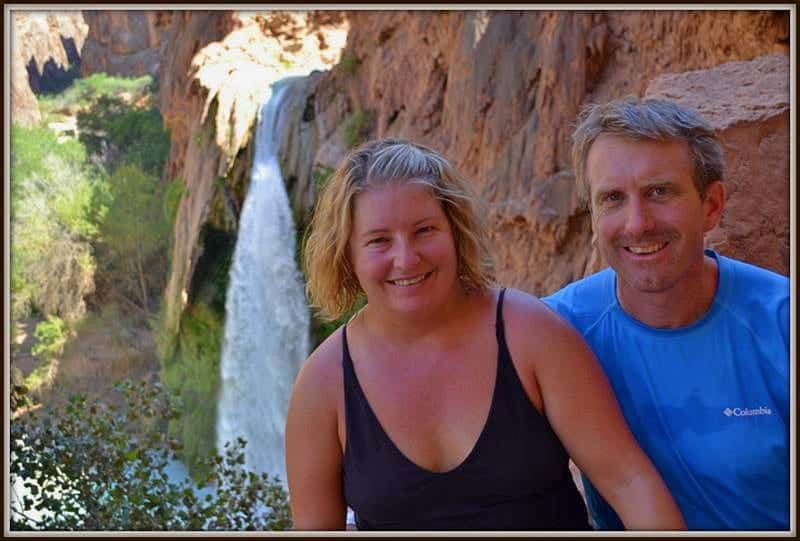
Hiking Havasu Falls is every backpacker’s dream, but you don’t have to be a hardened hiker to tackle this trek. We have hiked to Havasu Falls about a dozen times between Jenn and myself.
Our 51 point packing list takes you through everything you’ll need at every step of the way to make the hike fun without relying on helicopters or pack mules (although both are an option). We divided the list into five sections: Camping on Hualapai Hilltop, hiking the switchbacks, hiking Cataract Canyon/ Supai Village, camping at the falls, and suggestions of backpacking meals.
Gear for Camping on Hualapai Hilltop (aka the Havasupai Trailhead)
Let’s not sugar coat this, camping on Hualapai Hilltop ain’t great. It’s somewhere between meh and sucky. You only have two things going for you – fantastic night skies and a beautiful hike in the morning. The price isn’t bad either (free!). Other than that, you have rock hard ground, little or no place to set up, and hikers coming and going at all hours. Google Maps accurately describes it as a “Parking lot in the Coconino County, Arizona.” The nearest hotel is an hour and a half away so camping on the hilltop will get you on the trail earlier than any other option. Here’s our list to make it not so bad with clickable links if you want to send us some affiliate sale love 😉
- Camp chairs: You aren’t carrying these bad boys down the canyon, but there are no picnic tables on the hilltop. These will help you feel a little more at home and also give you a good place to perch as you wait for that primo camp spot on the east side of the lot. There you can have a little bit of extra room in front of your car to set up your tent. Don’t commit to a spot too early, as we said, people are coming and going all night long.
- Extra blankets: Hualapai is at 5200′, nearly 2500′ higher than the campground at Havasu Falls. What’s more, it’s a hilltop, so there is a lot more exposure. That kind of elevation difference means you’ll be about 12 degrees cooler up on the hilltop. Pack a couple of extra blankets that will stay in the car.
- Air mattress: Again, this doesn’t have to go down the canyon with you, but if you have room in the car you’ll love it for the hard ground of the parking lot. Same for a good pillow too.
- A lot of extra water: There isn’t potable water on the hilltop. There are a couple of high priced snack shops where you could buy a gallon if you needed it, but they will probably be closed after you arrive and not open before you start hiking. In fact, you should bring water for before and after your trip as well as the next item…
- Solar shower: You’re an hour and a half from running water, and you’re going to be stinky after hiking back up the switchbacks. Do yourself, your friends, and your car a favor and take car shower before getting on the road.
- Toilet paper: There are port-a-pots on the Hilltop, and they are usually pretty clean and well kept. Still, it doesn’t hurt to carry your own roll just in case. You should put the TP in your pack when you head down too.
- Camp Stove / Fuel: You’ll need this for the campground too, but I’m putting it in here to remind you that there are no fire rings on the hilltop.
Hiking the Switchbacks at Dawn
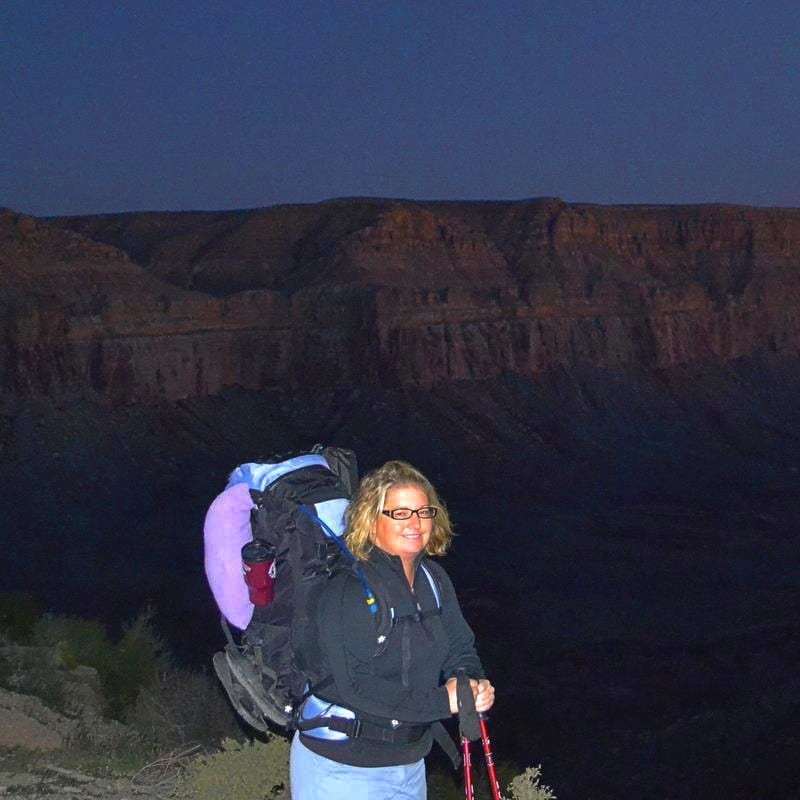
- Headlight: you just got through sleeping in a parking lot, so you could get an early start and beat the heat. There will probably be someone else camping beside you that will start the day at 0 dark 30. Since you’re up anyway, you might as well head out. Having a headlight (ready and not in your pack) will allow you to start before dawn. The switchbacks begin right away on the trail, so good lighting is a must. There are also rumors of mines by Havasu Falls, so a headlight could come in handy for a mine tour too.
- Mens Backpack/ Mens Backpack: Kind of obvious for backpacking but feel free to purchase one through our affiliate links. Make sure you a pack that fits your torso and keep it as light as possible. Aim for about 30 lbs all packed including food and water.
- Hiking poles: You will be heading down nearly 1500′ in the first couple of miles. Hiking poles will help take the weight of your knees and balance your step. You can look for one with a camera mount if you are bringing a fancy camera.
- Mens Vibram sole boots/ Womens Vibram sole boots: You don’t need watertight boots for Havasu Falls, but the Vibram sole will help you with the sharp rocks on the switchbacks. It will also give you a little extra stickiness on the downclimb to Mooney Falls. Ankle height is a matter of personal preference but make sure you break your shoes in before the hike.
- Wicking Socks: If you have never bought tech socks, you don’t know what you’re missing. They will wick away the moisture from your feet which keeps down stank and blisters along with giving you just a little more cushion. Totally worth it. Make sure there is NO cotton in them. On that note…
- Tech clothing and swimsuit: Cotton kills. Friends don’t let friends wear cotton. It’s better to get quick drying clothes that you can rinse at camp than to carry a lot of extra clothing. Don’t forget a swimsuit also, you will want to swim 😉 Remember – pack under 30 lbs and don’t forget the tech undies too.
Pro tip: Download AllTrails+ for a one-stop shop app for planning all of your hiking, biking, and camping adventures.
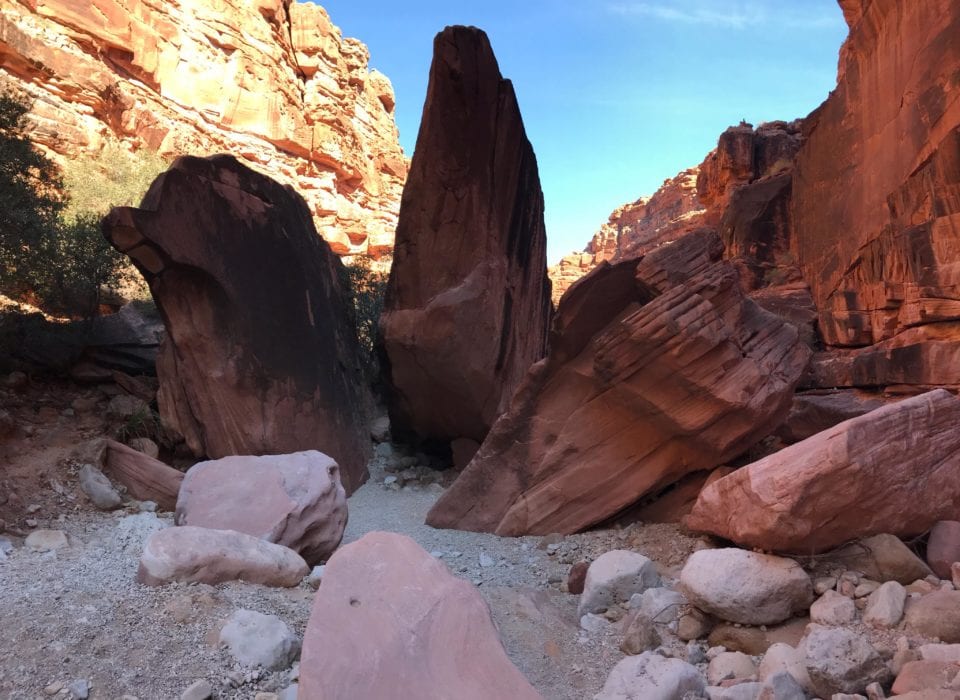
Hiking Cataract Canyon / Supai Village
- Extra pair of socks ready and accessible: Cataract Canyon starts right at the bottom of the switchbacks and runs about 4 miles until you reach the village of Supai. There isn’t much elevation change here, but you’ll be hiking in sand pretty much the whole way. The best thing you can do is change your socks out every rest stop. Take the old pair off. Get all the sand off your feet (including between your toes). Put on a fresh pair of socks and dry the previous pair on your pack. Keep swapping between these two pairs of socks every rest break.
- Sunscreen: The last thing you want is a sunburn before a weekend of hiking. The second from last thing you want it to carry a heavy bottle of sunscreen down with you. These little packets fit beautifully in your gear with almost no extra weight. Just make sure you bring enough that you don’t run out, and a small canvas ditty bag to keep the used packets in. Remember “Take nothing but pictures, leave nothing but footprints…” -Aliyyah Eniath
- Moleskin: Moleskin keeps blisters from forming, which means “Apply moleskin to problem areas before you begin hiking or as soon as you feel friction on the trail.” Like voting in Chicago, apply moleskin early and often.
- Bandana: A good hiking bandana has 101 uses. Here’s the 102nd use. Tie a DIY dust mask for when those mule trains start heading up and down the dusty canyon.
- Credit card and ID: You’ll need both of these to pick up your permit at the camp office in the village of Supai (about 8 miles down from the Hilltop). You’ll want your credit card to buy ice cream and maybe even a burrito in town too. You can skip two meals worth of weight if you plan on eating in the cafe going through town. You can also refill your water bottle while you wait.
- (and 20) Sunglasses and Hat: By the end of Cataract Canyon, you’ll be in full sun. You’ll want a floppy hat that you can dip into the Havasu Creek, which is where Cataract Canyon ends, and some sunglasses too.
Pro-tip: Protect your trip and yourself with World Nomads and Medjet
Gear for Camping by Havasu Creek
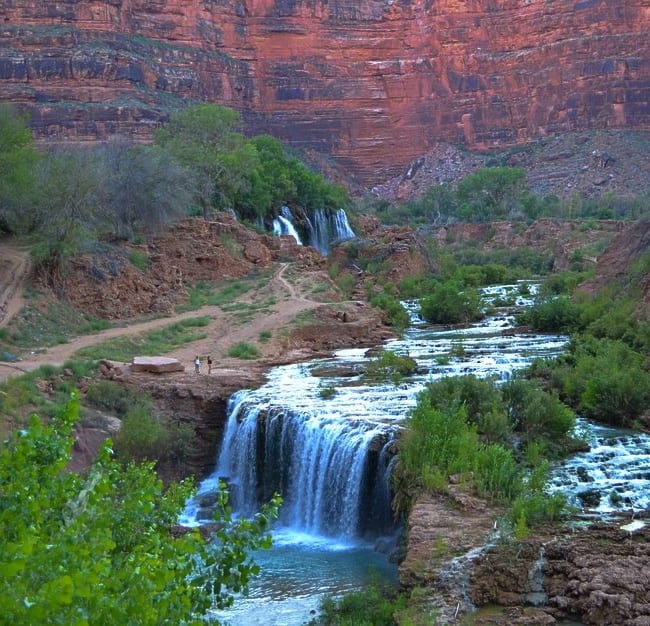
- Quick drying towel: About a mile beyond the village you’ll come to New Falls, the first of the waterfalls at Havasu Creek. You might jump in here. You might wait for Havasu Falls, but either way, you’re going to be entering the water sooner than later. When you come out, a quick dry camp towel is going to be your best friend.
- Camera: Havasu Falls is Beautiful with a capital B. If you take your cell phone, make sure it’s on airplane mode because there is not going to be any service. Save the battery for photos or GPS navigation.
- Extra batteries: I plan on having an led headlight which will not run out of juice. However, you’ll want to bring an external battery for your cell phone though because it’s part of your navigation kit to get back, an extra light, your camera, and a way to share contact info with your new friends you meet along the way.
- USB Solar Charger: In lew of batteries (or in addition to) a USB solar charger will keep your headlamps and phones charged for late night adventures, navigation, and of course many obligatory photos.
- Backpacking tent: A good backpacking tent goes a long way to staying under 30 lbs in your pack. This one doesn’t “need” to be staked in the ground so it can work on the hilltop too.
- Sleeping bag: Make sure you don’t burn too much pack weight carrying a crappy bag.
- Travel Hammock: Trust me, you’ll want one. Slinging a hammock next to a stream is just like heaven. At just over 2 lbs it’s so worth the weight. You can even sit in it like a camp chair.
- Lifestraw bottle or other water purification device: There is a spring at the campground that comes straight out of the rock wall. Some people think that’s good enough, but why take chances? You might as well use a purifier.
- Thermarest Pad: There’s a reason it’s a classic. It works.
- Camp pillow: I have been known to carry my regular pillow strapped to the outside of my pack. This one will save you some weight and not have that “campy” smell on your bedding when you get home.
- Day Pack: Mooney Falls is a mile past the campground (and trust me you want your hands free for the chain section). Beaver Falls is 3 miles past camp. The Colorado River is 7 miles past camp. With all these great destinations, you’re going to want to pack for a day hike and continue on past the campground.
- Camp Sandals: Let your feet out of jail when you reach camp and have a sandal option for day hikes. A little air on your toes will do wonders.
- Duct tape: Just wrap a little extra on your water bottle just in case.
- Aeropress coffee maker: This kit weighs less than a 1lb, so you don’t have to admit your a coffee addict when you put it in your pack. Think of it as a way to make friends at camp
- Cook kit: Plan your meals well along with how you’re going to cook them. Everybody in your party doesn’t need a cook kit but waiting for water to boil when you’re hungry sucks.
- (and 37) Plate/utensils: Everybody should have their own mess kit that has a light plate and a multi-use utensil. We selected a couple of our favorites in the links.
Food to Pack for Havasu Falls
The answer to what food you should take depends heavily (no pun intended) on how you get to the falls. If you send your packs down by mule, they will end up at the campground, and you can pack whatever you like (except alcohol because it’s prohibited) providing that fits below the weight limit. You can even get extra mules, so weight really isn’t an issue. If you send your gear by helicopter or fly down, you’ll have to hike your food the final two miles from Supai to the campground. We’ll write this guide assuming your backpacking because that’s the hardest meal plan to prepare for.
- Dehydrated dinners: These are a classic standby. All you need to do is add heat and water. They are a little more expensive than other options, but since they cook in the bag, cleanup is a breeze, and you might not need to bring any additional dishes or cook pot (other than for boiling water).
- MRE: Meals Ready to Eat. So ready, in fact, that they come with their own heater included. If you don’t have a stove (or don’t want to carry one). These are a great way to have a hot meal. They usually come with everything including a fork. A little extra weight but a lot less fuss.
- Ramen noodles: Their extra calories and salt are appreciated after a hard day hiking. Plus, you don’t HAVE to cook them. There’s the old smash, mix and eat option or, my favorite, tequila style. Lick your wrist. Sprinkle on the flavor packet. Lick the salt off as you take a bite of the noodle brick. Yup, it’s just as much fun as it sounds.
- Trail mix: Really, it’s a mix of food for the trail. Almost mandatory by the name alone. Nuff Said. To avoid redundancy, consider this the heading for beef jerky, summer sausage, Cliff Bars, and granola bars too.
- One frozen bagged meal: Here is one of my favorite backpacking secrets. You can carry one frozen dinner with you that you eat on the first night of the trip. This could be homemade and stored in a ziplock bag or store bought. Just make sure it’s sealed super well and pack it in your towel. It will still be cold come dinner time.
- Babybel: Since Babybel is wrapped in wax, it will stay good for a while without refrigeration. Same is true for eggs, and I’ve heard rumors about hot dogs in their original vacuum seal package too, but the FDA disagrees. You never know what somebody who eats ramen noodles tequila style would do. If you want to be extra sure, keep it packed alongside your “one frozen bagged meal” and eat it day two.
- Peanut butter and honey wraps: There’s an art to making good peanut butter and honey burritos. You have to mix the peanut butter and honey together before you roll the burrito. Otherwise, it’s a gooey mess. This lets the honey slowly seep into the shell to form a caramelized treat packed with protein come meal time. The reason you make burritos instead of sandwiches is, so they don’t smash in your pack.
- Dehydrated bean burritos: Speaking of burritos, regular stores like Walmart and Whole Food sell dehydrated/instant beans. Since these come from a mainstream store, you can get dehydrated food without the backpacking meal markup. You could even add a little Babybel and re-use leftover shells from the lunch meal of peanut butter and honey wraps if you’re looking for an integrated meal plan.
- Easy Mac and Cheese: Again, mainstream dehydrated food without a markup. You can even get a two pack at the Dollar Tree. This product is better than boxed mac and cheese since you just add hot water and wait three minutes.
- Gnocchi: Pasta at camp sounds like a great idea until you have to boil a pot of water for 10 minutes to cook a pack of spaghetti. The solution? Switch to gnocchi. You and find this potato pasta in a shelf stable vacuum sealed bag that cooks in 3 minutes.
- Meal for the ride home: Remember, you’re still hours from civilization once you return to your car. Having a can of something waiting at the car makes a lot of sense. Use your imagination, but remember you’re probably going to be hungry and tired so keep it simple. Also, it’s going to be sitting in your hot car the entire time you’re down in the canyon.
- A pocket full of pills: Modern medicine is amazing. The pills you can get will fix just about anything. They’re also lightweight and packable so don’t forget your meds. Take plenty of ibuprofen and don’t forget to pregame with “vitamin I” before you hike. Having a dose or two of Imodium wouldn’t hurt (think swimming in water and 8 miles of walking between restrooms). Extra multis and C’s are good too since you’ll be burning about twice your normal calories. Having a couple of doses of caffeine can come in handy too if you need a little boost to power up the switchbacks. Having a couple rounds of antihistamines (and maybe an epi-pen if you’re prone to anaphylactic shock) isn’t bad either in case the bugs bite or bees sting. 8 ounces of the right medication can save a trip in ways you can’t even imagine.
Below is a map to the Havasu Falls area. If it is not visible please refresh browser 🙂
Havasu Falls Packing List FAQs
What size backpack do I need for Havasu Falls?
For most, a 45-60 liter pack should be plenty for a 4-day/3-night trip to Havasu Falls. You could probably get away with a smaller pack if you’re sharing equipment with someone.
How many people are allowed in Havasupai a day?
There are only 350 permits per day to visit Havasupai. Three-night campground permits are obtained via a lottery system that usually takes place on February 1 via the Havasupai website.
Are there mosquitos at Havasu Falls?
If you visit during the warmer months, plan on there being mosquitos!
How hard is the hike out of Havasupai Falls?
The hike to Havasu Falls is 10 miles in and 10 miles back out. The hike in is all downhill meaning the hike out is all uphill. It is rocky, sandy, and there is very little shade. The hike shouldn’t be taken lightly.
Wrapping up our Havasu Falls Packing List
There you have it, our 51 things you need to pack for hiking Havasu Falls. You’ll be ready for everything from camping the night before to surviving the hike to enjoying the falls. We’ve field tested every one of these suggestions and know that they all work. Let us know in the comments if you’ve ever tried any of these things or have any of your own hiking hints to add to the list.
Places to Stay near Havasu Falls
Ready to Book Your Trip? These Links Will Make It Easy:
Airfare:
- Find low fares and book your flight with Expedia, WayAway, CheapOair, or Trip.com
- Grab your airport parking reservation from The Parking Spot
- Stay overnight at an airport hotel and park for free with Park Sleep Fly
- Enjoy your time at the airport at a Priority Pass Lounge
Car Rental:
- Need to rent a car? Discover Cars will get you on the road without breaking the bank!
- If you are brand loyal, you can also book directly through Alamo Rent-A-Car or Thrifty Rent-A-Car
Insurance:
- Protect your trip and yourself with World Nomads and Medjet
- Safeguard your digital information by using a VPN. We love SurfShark as it is superfast for streaming Netflix
- Stay safe on the go and stay connected with an eSim card through AloSIM
Our Packing Favs:
- Travel in style with a suitcase, carry-on, backpack, or handbag from Knack Bags
- Packing cubes make organized packing a breeze! We love these from Eagle Creek
Like it? Pin it for later on Pinterest!


 Hi! We are Jenn and Ed Coleman, and together we are Coleman Concierge. It is our goal to inspire you to get out, expand your world, and to seek adventure, even in your own backyard.